Learn how to apply makeup on hooded eyes with this step-by-step tutorial! If you're over 40 and looking for makeup tips to enhance your natural beauty, this video is for you. We'll show you how to use bronzer, blush, and eyeshadow to balance hooded eyes and create a beautiful, fresh, and flawless look.
What are hooded Eyes?
Hooded eyes refer to a type of eye shape where the upper eyelid appears to droop or cover the crease of the eye, making the eye look smaller and sometimes giving the appearance of a sleepy or tired expression. This is caused by an excess of skin on the upper eyelid that hangs down over the crease, partially or completely covering it.
Hooded eyes are a common eye shape, and they can be found in people of all ages and genders. They are often associated with aging, as the skin around the eye becomes looser and more prone to sagging over time. Some people are born with naturally hooded eyes, however.
There are many different makeup techniques and styles that can be used to enhance or complement hooded eyes.
How to balance hooded eyes
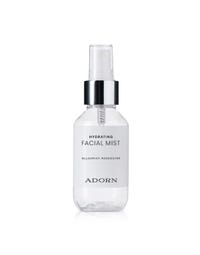
Hi, I'm Briony Kennedy, the founder of Adorn Cosmetics, and I'm bringing to you a tutorial on how to balance hooded eyes and start from foundation right through to complete my looks. I've had a lot of people asking about this. I hope you find this tutorial helpful. So, the secret Skin Prep, maybe not so secret, to have such flawless-looking skin is to have your skin prep first and have it prepped properly for your skin type. So, if you've got more mature skin, you might want to use our primer, the hydrating primer mixed with a facial oil. Or, if you've got more of an oily complexion, you might like to use this just on its own. Now, I have prepared Julie's skin already. We've spritzed with the rose water to make the skin nice and soft and supple so that the moisturizer goes in a lot deeper and hydrates the skin as much as possible. Therefore, the foundation is going to look a lot more skin-like, less cakey, and it's going to sit in fine lines and large pores much more naturally. So, definitely prepare your skin properly before applying your foundation.
Apply foundation
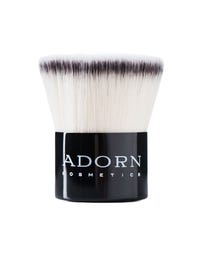
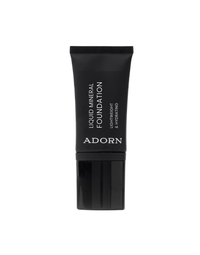
So, for today's look, I'm going to use the oil-free liquid foundation in medium olive, and I'm also going to combine it with my favourite product, which is the liquid skin illuminator. Why? Because it makes the skin look nice and dewy, which you can see on my skin today. Just mixing these two products together gives the skin a youthful glow, and a healthier glow, and it also gives a little bit of extra coverage to the liquid foundation. So, let's get started with the foundation, applying it with the flat-top kabuki brush. One pump of each is enough to get started. Okay, the pigment stretches quite a lot, so if just popping one pump directly onto the brush and then I'm blending in a circular motion, okay? You can see just by popping a nice foundation with that liquid aluminized, it's given a nice sheen on this side of the face compared to this side of the face. It's given a little bit of a glow as well, and of course, it's evened up any irregularities to the skin. I have put the foundation a little bit down the neck because again, as I always talked about in the tutorials, that decolletage is usually a little bit darker than our face, and we want to bring everything into balance. So, occasionally, you will need to put the foundation down the neck area.
Set your eyebrows
So now that we've finished the foundation, we've evened out our complexion. What I like to do is start with the eyebrows. Now, I do like to do eye makeup first before I move on to concealing under the eyes, because if you get any fallout underneath the eye area from your brow dust or from your eyeshadow, it's much easier to wipe that away now, then to put concealer on first, and then that mixes even with the concealer. So, if you are wearing eye makeup, do your foundation first and then do your brows, whatever else it is that you want to do in your eyes, and then you can conceal last and finish off with your blushes and bronzers, etc.
So, I'm going to use the brush that came from our large white brush set, and the reason I like to use that is just to separate the brow. Here, it just allows for the brow dust to go onto the skin more, and it looks more natural. Now, I'm going to use the brow dust in PEGI, which is a medium taupe-type color, and I'm using the angle brush in the same brush kit, and that is a number 14.
Now, you can use the brow dust wet or dry. If you use the brush wet, the eyebrows would be a lot bolder, a lot sharper. If you use it dry, it's going to be a lot more natural-looking. So, what we want to do, especially with a hooded eye, is we want to get the shape of the brows correct. It's going to give balance to the eye, and one of the things I find with people that want to wear eyeshadow, they try to create balance with their eyeshadow, and then often what they do is put too much eyeshadow on, and it can end up looking like you've got quite dark, out-looking eyes, okay. So if you get your brows right, you'll find the structure of your eye just naturally takes place, and you'll not need to put as much eye shadow on seeking that balance that you're trying to do. So, putting on the brows now, if you do want a more in-depth brow tutorial, head to the tutorial page on how to shape the brows. This is more about obviously the hooded eyes and how to get that technique right, but if you're wanting more information on the brows, head to the tutorial page and it will go through shaping it there.
Okay, so we've got this brow nice and shaped, we put the brow dust on so it's not too far underneath the brow, okay? So we don't want any brow dust any further than the edge of the eye. If we do, it's going to give a droopy look, which is what we don't want. So, when you've got a hooded eye, what we want to try and do is give a little bit more of a lift to this arch area, which is going to open up the eyes. So, I'm happy with the shape, but I'm going to just put a little bit more on the arch area just to create the illusion that the eye is a little bit higher.
Perfect! So that's just opened this eye up. You can see it's given some shape to the eye. And now I'm going to move on to the other side. So now that we've finished the eyebrows, and as I said before, head to the tutorial page to get some more information on that. But, you can see that it's created balance to the eyes, and now what we're going to do is balance the lids. Now, what I'd like to do with these is use the color that's called Topaz. It's a matte taupe color. So, if you've got a taupe color at home, you might be able to use that as well. You just want to pick something that's quite forgiving, easy to blend, and not too dark. Okay, so what we want to do is just create the illusion that there's an island there. And how we do that is just by placing some of the brow dust or your eyeshadow or a taupe color - anything that's a medium matte color - just here on the brow bone. So, we want to keep it in line at the edge of the eye, no further down than the edge of the eyebrow as well, okay? And we just want to place some color here. The reason I want to place it up here is I don't want to put it into the socket to start with, or it's going to create the look of a droopy eye. So, I'm going to put a little bit about Topaz on our dome brush, which is number eight, and I'm just placing it right on the edge of the brow bone. You can feel it if you push it in, and I'm placing it into the socket, so I'm almost hitting backways. I'm not blending out. I find if people blend out, what you're wanting to do is blend down, and then that's going to add to that droopy eye. We don't want to do that. We want to create an illusion of a bigger, more almond, open eyes.
So the trick is just to put your, I guess, always paint-by-number dot, just place it right there, no lower than the edge of the eyes I just said in the brow, and then just place that eyeshadow then back into the socket area. Now once I'm happy with where I've placed that, I'm gonna start blending it. Now you can already see that's going to create a lift to the eye. We want to place it in the right place and then we blend it. Okay, so what we're gonna do now is just blend this down into a C. So I'm blending it back towards the iris, back towards the pupil area, and now I'm going to finish with what's left on the brush into the socket. Now, at this point, all I'm trying to do is create some balance to the eye. I'm not worrying about blending it so much because in all of my tutorials I talked about having a clean brush handy, and what that will do is self-blend your eyeshadow for you. Okay, so looking at the camera, you can see Julie has got some balance to the eye now, but we've also got to get rid of this blending up here.
Fake a crease and blend it out
Okay, so what we want to do is grab a clean blush brush, and then we're going to blend away any of that area that you can see that's transitioning. We want that to be seamless. First of all, I'm just going to put a little bit more though into the socket, and again it's put a little bit at a time, just keep adding. It's easy to add; it's a bit harder to take away. Okay, perfect. Now I'm gonna grab the clean brush. My always liked to have this one, which is the really tall dome brush, as my clean brush. That's the number four, and I'm gonna now just use it to get away that engine at the top. So if I was to use the same brush, I'd just be spreading that color further and further up the eye and creating a smoky, I suppose, unflattering punched-out look. He's often when I get told people end up looking like, so we want to use this clean brush just to blend away the lines. Okay, perfect. So you can see that's just really naturally created a socket, and it's created some symmetry between the eyelids. You can see now there looks to be an island here. Okay, and it's just basically made this part of that I disappear. So darker things look smaller, and obviously lighter things look bigger, and that's what we're trying to do is create this area here just that little bit darker than the rest. Now it's not going to completely hide everything, but we just want to minimize it in a way that it's something that you can do at home just to give that balance back to the eye. Okay, so moving on to the other eye, because I know you're gonna want to follow this technique again. We've just placed the eye shadow on to the edge of the brow bone that we can feel, okay, which is in line with the edge of the eye and the eyebrow, no lower, or you're going to create that droopy looking eye, which is what we're actually trying to correct as well as the hooded eye.
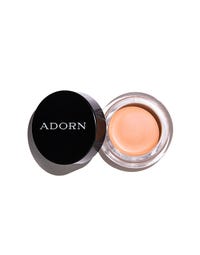
Now, I'm going to place as much eyeshadow in the crease as I can. Again, you could do this with any color that you're comfortable with, but something that's sort of light to medium. Anything too dark might be a little bit harder to blend and a little bit harder to control, so I just think while you're getting used to it, stick to some of these medium sort of colors, and definitely more matte. All right, so I'm going to pop this down towards the iris and the pupil, and now I'm going to start blending into the socket. So we're effectively, again, just creating the illusion of an eyelid, the illusion of a socket, by putting a slightly darker color. It will look smaller; lighter colors make things look bigger. So that's why I'm using a matte, not a shimmer, for this look because if you've got hooded eyes or you've got excess skin, anything that's got a shimmer is going to make that area look bigger. So you really want to just stick to the matte shades. And again, I'm going to go and get the clean brush, okay, and I'm going to now self-blend. Now that we've created that symmetry that we're all desperate to achieve and we've got the hooded eyes, it's time to conceal underneath. I've wiped away any excess eyeshadow that has fallen underneath there, so we don't want that to mix in with the concealer. The concealer that I'm using is the Peachy Sleep. It's in a wind-up tube, and it is in biodegradable packaging, which is great. Now, because I'm using this on Julie, I'm going to be using the number-10 concealing brush. You can use fingers, as I often show, but if you're always interested in looking at how you can use your brushes, this would be it. So just put your brush onto the Peachy Sleep concealer, which is the under-eye corrector.
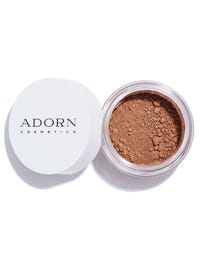
You don't need too much, and just dabbing on the corner of the eye. Is it quite dark in there? And then on the outer corner of the eye where we have the tear ducts, which can often get a little bit red. So you can see on this side it's nice, it's corrected, it's almost a little bit luminescent. So it's actually given some height to the cheekbones as well. Just by correcting the under eyes, you're going to look less tired. It's obviously going to be balanced to the eyes as well, and it also helps enhance the cheekbones. Okay, now that we've finished concealing underneath the eyes, I'm going to move back on to the skin on the face. I'm going to look at bronzers, contouring the face, and then finishing off with blush. After that, we will get back to the eyes, finishing off with the mascara, and we're gonna reveal one of our new lipstick colors, which I'm super excited to show you. So for those of you that are wanting to contour, you may want to look at a darker foundation color than what you're using. You may want to use a bronzer. I'm going to use the bronzer in Milan, which is a matte sort of color. Now, the reason I like to introduce a bronzer or a darker foundation to the look is that it basically breaks the skin up. So when you're just wearing foundation, it can look one dimensional. And what we want to do is have the skin looking as natural as possible. So believe it or not, having just foundation on, even though you think that simple, actually looks more makeup, even if you introduce an extra couple of colors. So the bronzer, I'm going to use around the hairline. Okay, now what I love about this is not only does it create the illusion of healthier looking skin, but if you have an area that you want to have enhanced or hide, this technique will do it. So I'm effectively going to be doing a three.
I'm going to be putting the bronzer into the hairline. I'm going to be running it along the cheekbones, and then I'm going to be popping it along the jawline. Now, putting it here is going to make it look darker. The cheekbones will, therefore, look lighter and bigger. Popping it along the forehead is going to minimize the height of your forehead, so if you're conscious of that, it will minimize the forward. Putting it along the jawline is going to give a really nice structured-looking jaw and hide any skin here or excess fatty tissue that we want to hide, so if that's something you want to create some structure, then it will do that. If you find that your décolletage is a bit darker than your face, green the bronzer on your neck is going to bring everything together as well. Okay, so just a small amount on the brush, and you're just blending it very gently around those areas. Again, it's like a number three. And if you make a mistake or you put too much on, don't worry about it because you can come back, grab your kabuki brush, which always has a little bit of foundation left on it, and you can gently sweep up and away, and it's going to bring the foundation and that bronzer seamlessly together.
So, you can see on Julie's side of the face here, it looks a lot healthier. It looks like it's got some different elements, different structures - it's more like a 3/4 D, not so flat as this side of the face. Okay, so a lot healthier, which is great. So, I'm gonna finish off the other side of the face, and then I'll be back with blush.
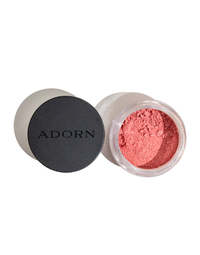
Okay, so blush. We finished the bronzer and the contouring of the face, and now we're going to pop on some blush. Now, I do find that people are not always sure where to put their blush, and I think that if you've got more of a narrow face, maybe if you've got a skinnier face, what you want to do is make sure that the blush is not coming too far down. Okay, we don't want to look like a clown, and we don't want our faces to look any skinnier than they need to be, so a good way to, I suppose, give yourself an indication of where it should be put for your face is if you look at the edge of your brow halfway through your nose, and then this is a really good starting point to place the product, and then you blend back up into the hairline. So, this is really good, especially if you wanted to use something that's more of a pop of color because you definitely don't want this really defined-looking tip on the face. Again, if you put too much blush on, the beauty about kabuki brush is that it self-blends everything. Now, that's too bright for me, so what I'm going to do is now grab the kabuki brush and any of the foundation that's been left on that even if seamlessly blend the blush away like it looks completely natural. So, you can see now that that's just given a really nice flush to the cheeks rather than it looking more concentrated just on that one area.
Okay, now that we've got the skin looking really beautiful, fresh, and flawless, I am going to finish off this look and reveal a new lipstick color. I'm also going to pop on some mascara, and I'll be back with you in a moment to reveal one of our new bright colors.
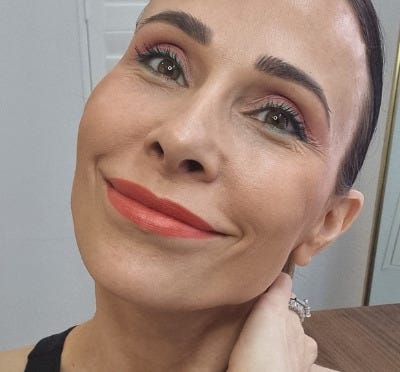
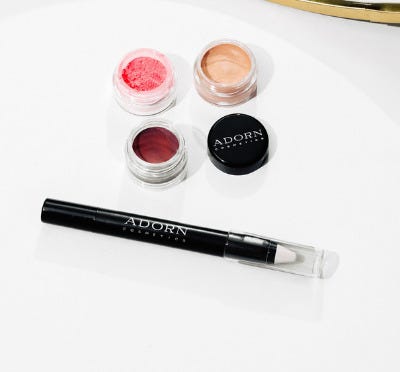
And here we have it, the final look. Julie is wearing the tenacity bright red newly released lipstick, and you can see, with the eye shadow placed in the right way, for all of you that have been looking for a way of balancing a hooded eye, this is the easiest way to do that. So, take a look at all the products that are needed, and I hope you found some helpful tips along the way.