Class 5: Makeup Masterclass on How to Shape Your Brows
If you’ve ever felt overwhelmed by brow trends or unsure where to begin, this eyebrow shaping tutorial for beginners is for you. Whether your brows are naturally full, sparse, or somewhere in between, the right techniques and tools can transform your look lifting the face, enhancing symmetry and framing your eyes beautifully.
In this Adorn masterclass, our founder Briony walks you through how to shape, fill, and lift your brows like a pro, using only a few essential products. Let’s break it down step by step.
Catch our founder Briony’s Masterclass for her top tips then scroll on for the full breakdown in the article below.
Why Brow Shaping Matters
Your eyebrows are one of the most powerful features on your face. A subtle tweak in shape or placement can completely change your expression making your eyes appear more open, your cheekbones more defined, and your features more balanced.
This eyebrow shaping tutorial for beginners focuses on natural, flattering results. No harsh lines or stencils just your brows, enhanced.
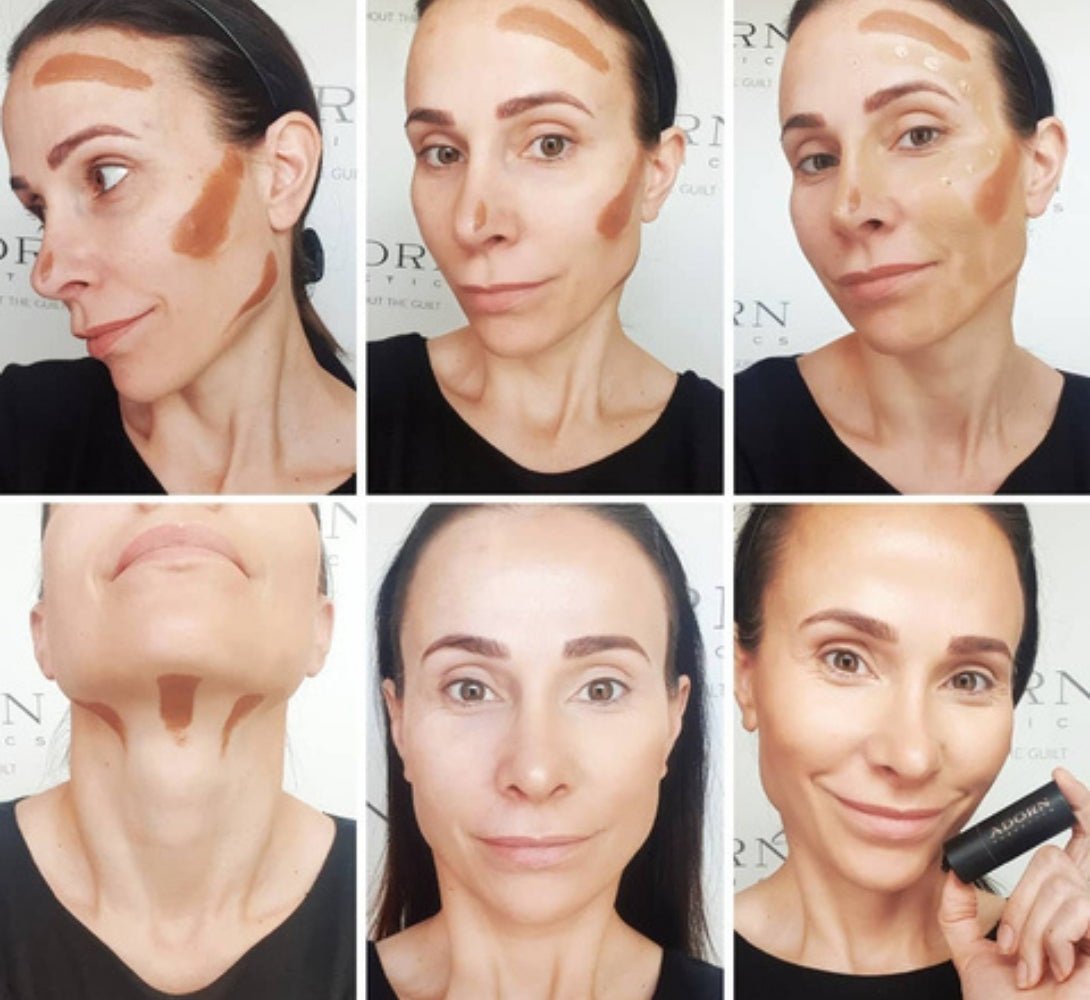
Step 1: Prep the Canvas
As with any makeup look, prepping the skin makes a big difference in how your brows perform and hold throughout the day.
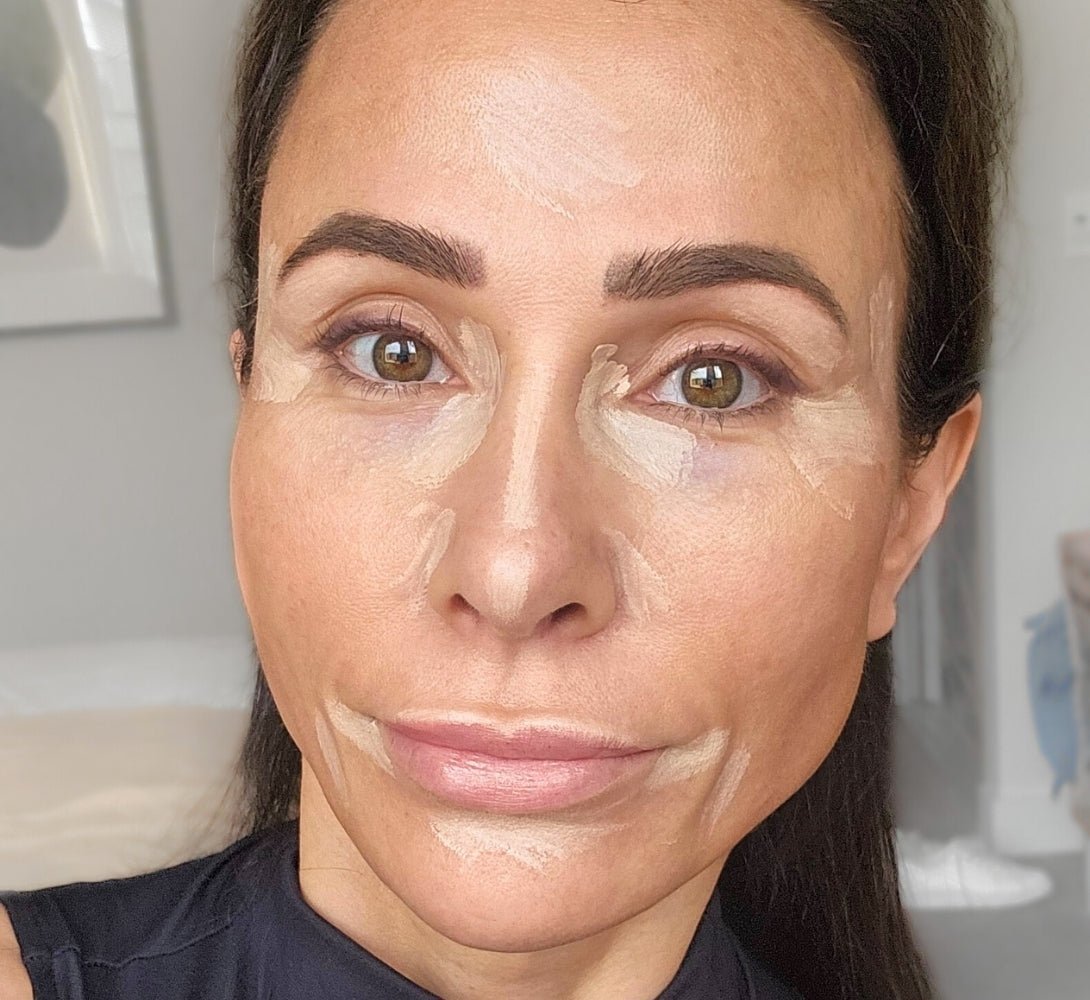
Start by misting your face lightly with the Bulgarian Rosewater Hydrating Face Mist. This soothing mist helps hydrate the skin, refresh your base, and keep brow powders from clinging to dry patches.

Next, apply a tiny amount of Mineral Eyelid Primer around the brow bone. While typically used for eyelids, it also helps smooth and prep the brow area for more even powder application.

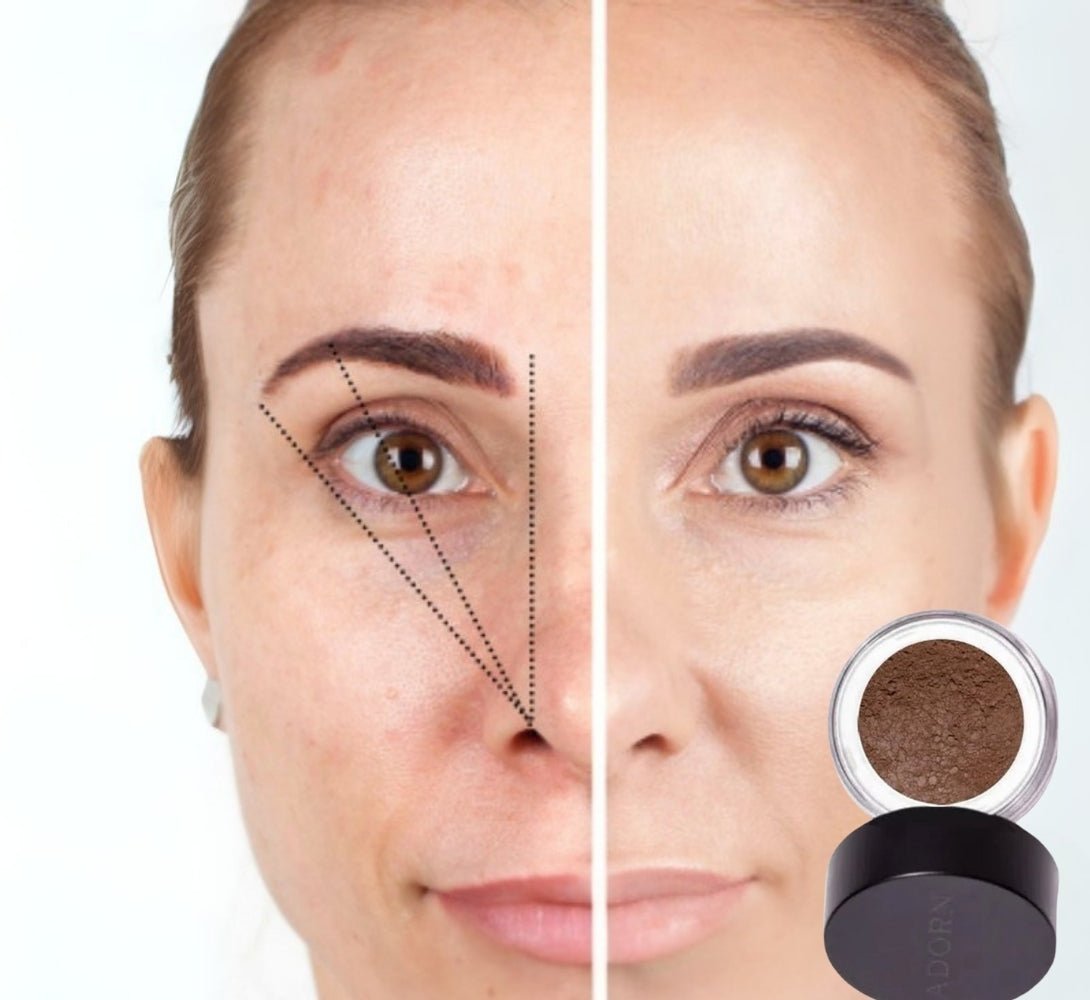
Step 2: Map Out Your Ideal Brow Shape
A major part of any eyebrow shaping is understanding where your brows should start, arch and end based on your face shape and eye spacing.
Here’s the basic rule:
- Start: Line up a brush vertically from the edge of your nostril to the inner corner of your eye. That’s where your brow should begin.
- Arch: Angle the brush from the edge of your nose across your pupil. That’s your natural arch point.
- End: Tilt the brush from the side of your nose to the outer corner of your eye. That’s where your brow should taper off.
Making these subtle adjustments can help balance your features especially if your eyes are close- or wide-set.
Step 3: Pick the Right Brow Shade
When choosing a brow colour, aim for a shade that complements your natural hair colour and skin tone. A good rule of thumb for beginners is:
- Blondes: Go one shade darker
- Brunettes: Match or go one shade lighter
- Redheads: Try a warm taupe or soft brown
- Black hair: Avoid true black—opt for soft charcoal or deep brown
The Mineral Brow Powder comes in a range of buildable, natural-looking shades. It's made with pure minerals, perfect for sensitive skin and refillable to reduce waste.

Step 4: Application Techniques – Wet vs Dry
This part of the eyebrow shaping tutorial for beginners is where things get fun. Using the right technique and brush makes a huge difference in the final look.
Use the Angled Liner Brush to apply the brow powder with precision.
- Dry application: Gives a soft, natural look—great for daytime or beginners
- Wet application: Dampen your brush slightly with water or rosewater mist for more defined, hair-like strokes or bolder colour

Start by lightly outlining the bottom edge of your brow. Then use small upward strokes to fill in sparse areas, focusing on the tail for definition. Blend through with a spoolie to soften any harsh lines.
Step 5: Shape and Lift Naturally
A common mistake in brow grooming is over-arching or over-tweezing. This tutorial focuses on enhancing your existing shape not creating a totally new one.
Follow your brow’s natural growth pattern. Use your brow brush to softly lift the tail or add structure to the arch as needed.
To give the illusion of a lifted brow, you can apply a small amount of Mineral Eyelid Primer just under the arch on the brow bone. This adds brightness and helps clean up the edges of your brow work.
Step 6: Set and Refresh
Once you’ve shaped and filled your brows, lock everything in place with a gentle mist of the Bulgarian Rosewater Hydrating Face Mist. It not only sets your makeup but also helps your skin feel refreshed and hydrated throughout the day.
You can also lightly run a clear brow gel through your brows if you prefer added hold.
Your Natural Brow, Only Better
Perfecting your brows doesn’t mean following trends it’s about enhancing your features and embracing what makes your face unique. This eyebrow shaping tutorial for beginners focuses on giving you control, confidence and results using clean, vegan, Australian-made products.
With a little practice (and the right tools like the Mineral Brow Powder and Angled Liner Brush, you’ll be shaping and filling like a pro in no time whether it’s for everyday or glam occasions.
Quick Links to Shop the Look
Enhance your brows naturally with these Adorn essentials:
- Mineral Brow Powder – Buildable, natural brow colour
- Better Makeup Brush Set (includes Angle Brush) – Precise tools for pro results
- Mineral Eyelid Primer – Smooth and lift the brow bone
- Bulgarian Rosewater Hydrating Face Mist – Prep, set, and refresh
Watch All Masterclass Episodes:
Masterclass 1: Skin Prep - WATCH HERE
Masterclass 2: Makeup Tools - WATCH HERE
Masterclass 3: Foundation - WATCH HERE
Masterclass 4: Concealer & Eye Primer - WATCH HERE
Masterclass 5: Brows - WATCH HERE
Masterclass 6: Contour - WATCH HERE
Masterclass 7: Blush & Highlighter - WATCH HERE
Masterclass 8: Eyes & Lips - WATCH HERE