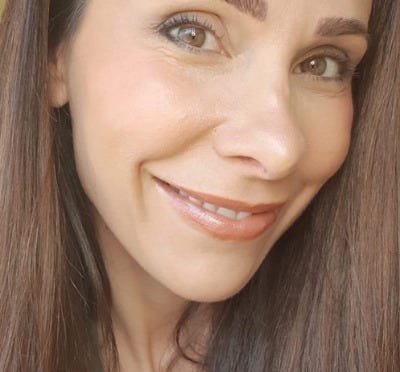
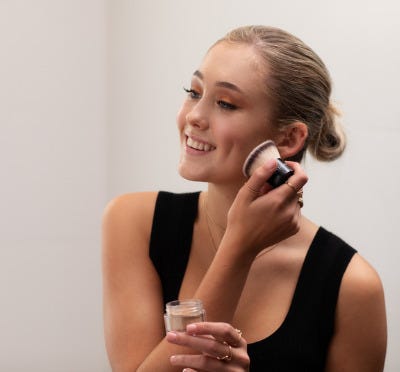
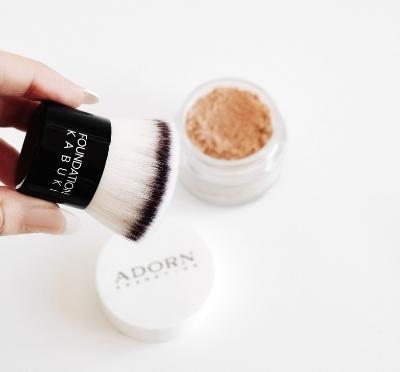
Briony's shares our limited-edition Illuminating Palette for a radiance complexion.
The many uses with this glow-to palette.
TRANSCRIPT
now i'm going to introduce some of the shades from our new palette okay so i know that everybody's been interested in how to use these products there's so many different ways that you could use them it's so up to you but i'm just going to start by giving you some tips around lifting up the brow by grabbing a clean brush and one that's a little bit smaller and i'm going to just pop a little bit of this particular here just to give some really nice open structured brows okay and open up those eyes now you could use this wider shade but i'm going to use that somewhere else to make my eyes look bigger so if you've got a hooded brow or you've got more of a supposed more sort of a fleshy area just here you might find that using something that's shimmery will make that look more pronounced so what you might want to do is just stick to just this outer area here just a little bit along the brow bone but not focusing here because that's going to make that look even heavier and droopier so again it's just placing this little bit of highlight to this outer third again so pretty much anything you do to make the eyes look bigger concentrates on this outer third of the eye and it just gives that nice little lift now if you don't have that hooded or that excess skin here you might like to even take it underneath the brow to make this area open up even more again if you've got hooded eyes or excess skin or it's quite prominent then you might not want to do this the whole way along okay right and that just opens up the eyes even more okay so then what you might like to do is grab so then what you might like to do is grab another angle brush and just pop this white shade just on this inner corner here and see how it not only make draws attention to the whites of your eyes it makes your eyes look whiter but it also makes this area look bigger again it's just this little corner that we're doing perfect okay and then one more tip just to get the eyes looking really nice and open is to pop a little bit of shimmer just here so what that's going to do is just again give height so this i'm going to use this more salmon neutral color and you could use the white i think the white could be a bit intense for some so i'm just using this nice little salmon this is a little tip that i picked up from actually ray morris many years ago that i've seen that i i love it's just such a simple little and it's almost just a dot in line with your eyeball here see how it just opens up your eye that little dot so underneath the lashes i'm looking down but if i look straight ahead it's in line in line with your eyeball here and here just to open that eye right up okay so i'll come back to the palette on how many other things you can do with it of course you could use these as eyeshadows as well you could use them as bronzes it's really up to you and blush if you'd like so coming back to that in a moment now for those of you that do find that your eyeshadow moves again for me i don't find the cream eyeshadow moves which is great but i know some of you have this as an issue what i would do is get one of our really large brushes from the brush kit okay keep that one clean because this can be your blending brush i always have a clean brush handy to not only blend my eyeshadows but also just to help mattify them if i'm wanting to set an area down so just get a loose amount of the oil control setting powder and just pop it on to the ball of the eye there you don't want to take it up to here because obviously you're going to lose all that nice shimmer so just on the ball of the eye it will dull the eyeshadow a little bit so you really want to just stick to this area okay try not to go into that crease too much now one of my favorite tips is that if you've gone a little bit low or you've gone a little bit heavy-handed on your outer corner because obviously we want that to be nice and crisp and lift the eye up if you've made that too heavy or it's too droopy always have again another clean brush that's more of a concealing brush handy and all you need to do is just have a little bit of your foundation dipped onto that and then you just sweep it up so you just pop the brush flat i love the face as i pull when i do this so just lift it up like that and it will just erase all of that from down there and it'll give a natural lift to the eyes by pulling that product upwards so that's just a little tip have a little bit of concealer or even your foundation nothing too heavy because you don't want to work take away the work you've done but it'll just help to lift that i do like to sometimes come back to my eyes after i put mascara on because then i can see if i actually want it a little bit more intense or not but i do obviously start by getting most of that done before i've put my mascara on now what i'm going to do is i'm going to use the palette just to give me a little bit of warmth and i'm also going to use it for a blush and an illuminizer again you can use this for your eyes as we've just gone through but you can also use this on the face as well all right so one of the things i'm going to do first is just give a little bit of warmth to my face i like to have an extra dimension i suppose by popping a little bit of bronzer or even a pigment blend even a darker foundation just along my hairline it just warms up the face so it doesn't look so one dimensional with just foundation and i've also got pigment damage on my forehead and i find that the bronzers tend to help neutralize that so i'm going to use this color here in the palette with one of my larger brushes so just remember that the larger the brush the less coverage you'll get and you can see that that's given me a nice little bit of warmth now if you've been a little bit heavy-handed which i was initially you should be able to just blend that away but if not always come back to your trusty kabuki brush that's got a little bit of foundation on it and you can just sweep over it to tone it down a little bit so the important thing here with the minerals is they all work really well together they all mold together really well so if you do get something that is a little bit heavy or you've not been paying attention and you've got too much on the brush and you've just dulled it on then just use your kabuki brush to blend that away a little bit okay so i put the intensity just up along my hairline but i've also then with what's left on the brush just gently sweeped it down so i don't look like i've got a line of bronzer now you might like to just bring that what's left on the brush down onto the underneath of the cheek area if you're already quite sallow then i wouldn't do that because it will make the face look even thinner obviously making this area a little bit darker will give more structure to the cheekbone but it will also narrow the face if you've got a larger face a square a face or a very round face this is a really quick technique just to give a little bit more structure but without going to the effort of having to fully contour your face so it's just using the rest of the bronzer that you had on your face and on your brush rather and you're just blending that down under the cheekbone area you might also like to use what's left on the brush down along the jaw to give some nice structure and of course if you're wanting to you might like to even just dust a little bit down the neck especially if you've got excess skin here or excess fat here and you're trying to create a little bit of structure you might like to just put a little bit of your bronzer or your contour product just under here again you don't want it to be too much darker than your foundation or you're going to really notice it the key is just to have a very nice very soft change in color that's a little bit darker than your foundation to give that nice structure to the face the jawline the cheekbones again a couple of shades darker is probably enough now i'm happy with that i often like to then just use my brush with what's left on it just to gently sweep over my my mouth just to bring everything together that's just me um i just like to give a little bit of that little extra bit of color to the rest of my face so it doesn't look so strict structured um or the product doesn't look so structured and separated i guess is the word all right so now what i'm going to do is pop on some of the blush which is also a darker aluminizing product here and i'm using a large brush because i want this to be quite sparse i don't want it to be too intense i want it to be quite natural that is such a pretty color i love that and that really gentle sheen that it has just gives a really nice glow a healthy dewy look but it also makes the cheekbones stand out and look that little bit bigger so this color is kind of like a little bit of a a dark peachy sort of a salmon color and it's really pretty on the eyes as well okay so i'm really happy with that intensity of that cheek color it's quite natural and neutral if you're wanting a pop of color i do love using two blushes and so you could use a cream or you could use one of our other intense blush colors over the top summer would be really pretty one of the products that i really love is using the natural pink lipstick so i just love using two different blush colors i just find the more color you can add it looks more natural because it creates a natural flush rather than just one blush color so i tend to put a more neutral color on my cheeks and then something a little bit more intense on the apples of my cheeks not too low because we don't want to drag the face down unless you have a rounder face then you might like to take the blush down a little bit further but i'm quite narrow here so i tend to keep this pop of color with my blush up on the tops of my cheeks definitely no lower than my mid nose area so that's a way you can introduce a really pretty pop of color even something really super bright and just blend that in with a neutral color underneath okay so moving along if you're wanting to use um some aluminizing products to enhance your nose or your brows even sorry your cheeks even more maybe even your lips you might like this particular technique so getting a smaller getting a smaller brush what you might like to do is pop a little bit of the lighter illuminizer onto the temples another little trick for those of us that are a bit more sallow that will just help lift that area and make it look more plump so a little bit of a luminizer there and then that extends into your blush you could pop a little bit onto your forehead for some dewyness although if you've got dry skin or you've got wrinkles there i would avoid it so really you want to avoid anything that's too shimmery on an area where the skin is dry or the skin has excess or has wrinkles that you don't want to draw attention to okay so that is just a quick little luminescence i haven't put too much on my cheeks because it was already in the cheek color that i used now for lips a little trick if you've got smokers lines or you've got wrinkles on the lips you might want to skip this and just go straight to your lipstick or your gloss but for those of you that want to enhance your lips and also make them look that little bit bigger here's a couple of little tips from me it's about making the central part of your mouth a little bit lighter than the rest because it's drawing attention to that area lights more reflected in the middle which is giving you the illusion of a pound so using this color here the darker of the two tops you could use an angled brush and all you need to do is just trace the top of your cupid's bow and then that just gives a little bit of a lip curl a more natural lip curl you can also again i wouldn't recommend this if you're someone who's particularly sweaty because you probably get this naturally but if you wanted to just pop a little bit on this skin above your cupid's bow blend it really well because you don't see two lines but that's just giving light to this part of my mouth giving the illusion of a fuller more curled lip you can take that one step further by popping a little bit underneath okay and of course also in the middle of the lips it just keeps the lips a little bit lighter in the middle when you put your lippy on you could also do this over the top of your lippy if you wanted to or you can also use two different lip colors okay okay so that's perfect so then when i get to my lipstick the lipstick is going to be lighter here just very subtly just giving the illusion of that lip powder so i'm going to use the natural pink lippy so the natural pink lipstick i just love this i use it on my as you know my cheeks which i just did but i also love it as a really nice lip color it's a nice pinky nude now i've just popped my lipstick on without any lip liner you can of course put lip liner on as well my tip there would be to stick to your lip line if you've got this little white edge of your lip like i do you could possibly put the liner there but definitely no further than your actual real lip line because it stands out and it's really obvious so just sticking to this nice white line and for someone who has a flatter side of their mouth you could just ever so slightly go on to your white line there but this one maybe keep it just slightly under so then you're just creating that balance makeup is all about being fun it's all about enhancing things that you love and maybe just help subtly toning down things that you don't love it should never be about a mask changing completely the way you look and i do think again it's about still letting some of your natural features shine through that includes your skin and some of your imperfections at the end of the day do something that you love step outside your comfort zone a little bit watch some more of the tutorials for some tips pop me on your bench somewhere and just put it on pause until you get some of these little tips to down to perfection and then it'll just be something that you do really easily each and every day


