Adorn Founder Briony Kennedy reveals her favourite go-to nude 'no makeup' look - perfect for any age & any occasion.
TRANSCRIPT
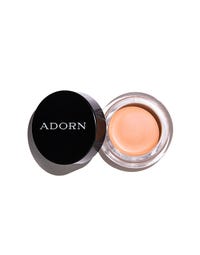
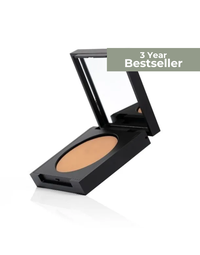
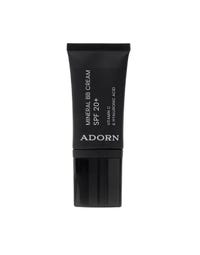
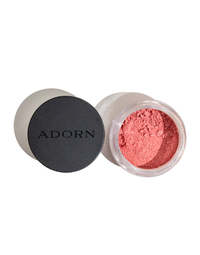
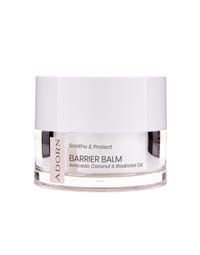
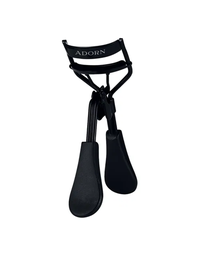
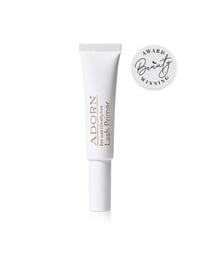
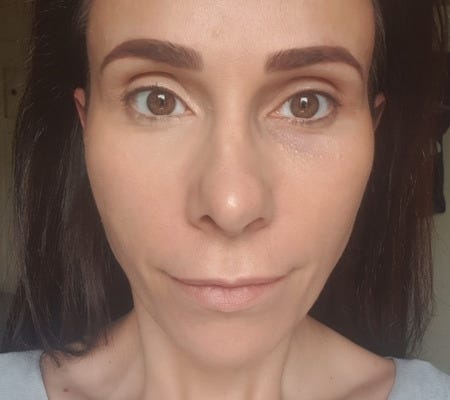
Hi I'm Briony Kennedy and I'm the founder of Adorn Cosmetics. Now this is me without makeup and I just wanted to run you through some of my favorite makeup Artistry secret tips that will give you healthier looking skin beautiful open looking eyes and just a few simple products to achieve this this is my go-to favorite nude makeup look using just a few of the right products to achieve that really nice glowy looking skin almost like you've just had a facial so let's get started first product that I am going to use is our BB cream it is a beautiful product it's really lightweight and of course it looks like your skin with the added benefit of the SPF now you can apply this with your fingers you can apply this with our Kabuki brush our complexion blender I'm going to use our buff and blend because I just want a really sheer coverage and I really want that buffed into the skin now when you're applying your makeup especially your foundation of course start in the midsection of the face and blend out that way you're concentrating on all of the coverage being where you most need it and then allowing the skin to just do its thing and look healthy and just peep through that makeup and then of course you can just keep building up that coverage where you need it so this is just for you know everyday healthy dewy looking skin now I'm just going to pop a little bit more where I need it now so I'm just going around the face and spot treating the foundation where I feel that I need that extra coverage so starting in the T-Zone and then just spot treating the skin that needs that extra bit of coverage now I do recommend putting a little bit of your foundation or your bb or whatever it is that you're using over the eyes now you might not want to buff the eyes because that's obviously a really nice delicate skin area that you just don't want to stretch unnecessarily so maybe just use your fingers just to give a little bit of sheer coverage with your foundation over your eyes it just means when you get to putting your concealer on it's not going to look so two-tone foreign blend brush for the areas where I've got really large pores especially when I'm wanting that really nice natural look I don't want my foundational BB to accentuate large pores so this particular brush is awesome just for pushing the product a little bit further into those areas okay now that you have your base done what we're going to do is correct the under eye circles or any other little blemishes that might just need a little bit more coverage now I'm going to use our really super popular Miracle peachy sleep concealer this product is exactly that it looks like or makes you look like you've had a really nice peachy sleep it helps neutralize all the dark circles any blue black and of course any veins now I like to use either my middle or my ring fingers to do this simply because there's less pressure and I just get more coverage when I'm patting so when you're buffing or you're sweeping your foundation on with full fingers you're going to get a lighter coverage where you need more coverage you use a patting motion and that will deliver more product to the area that you need it and look at that my eyes look brighter they're lighter they look healthier just with that simple product it is just amazing I love the peachy sleep and so many thousands of women do also absolutely love this product it's amazing now I really like to go into the temples as well to give the face a little bit of a lift and then I like to put a little bit of concealer just around the nasal fold here just to brighten that area up and just a little bit on the chin as well just to brighten that area up as well okay perfect happy with that really nice healthy looking skin at the moment there's that dewiness coming through as well with the BB which is what I really love and of course I've got the 20 plus so I know that I'm getting that extra sun protection okay now I'm just going to warm up my skin a little bit using our Contour compact now you could use the cream products for this you could use a darker Foundation even if you'd like to or a bronzer so I'm just putting a little bit on my forehead just to create some warmth so it just stops your skin looking one-dimensional now all I've done is put that on my forehead and down around the temples if you're wanting to really Contour your face you can or warm it up a little bit more you could pop it underneath the cheekbones as well pop it on the neck area if that needs a little bit of lift of color because often our chest is a lot darker than our neck and our face so today I'm wearing a jumper so I just need to make sure that my makeup is matching my neck and my face together but if I had my neck exposed I would make sure everything is matching my decolletage so sometimes that might mean you need to lift the neck up with a slightly darker color or something like a contour or a bronzer just to give it a bit of a lift okay so now what I like to do with what's left on the brush which is a minimal amount of product in regards to a contour bronzer or whatever it is that you've just used and I just very gently sweep that over the eye and what that does is it gives a little bit of color on top of that corrective concealer so you don't have what I would call makeup seam so you can see the difference between the concealer and the foundation we want it to be seamless so that there's no defined area between the two or two color variances it wants to be nice and gradual to look really natural all right so that is the skin finished for now what I want to do now is just put on a really beautiful cheek okay so this is something I love and it is doing what I would call like a glassy looking cheek or blasty looking skin so it makes you look like you've just stepped out of a day spa or a salon and you've had a facial so the trick is picking any of your blushes whether it's a cream or a loose pop that on first and just you just want to put your blush on the tops of your apples you don't want it to go too low because it's going to drag your face down so if you've got a narrow face like mine you want to keep it all in line with this mid part of your nose and blend up into the temples if you've got a broader face or a rounder face and you want to look slimmer then you can definitely bring the blush down a little bit further maybe in line with this part of your nose here so again just think if you're trying to look like you have a lifted healthier more youthful looking face apply the blush higher up and if you're wanting your face to look slimmer you can apply it further down now making sure notice I'm going back and forth between two cheeks just to really make sure that's nicely Blended now I am blending in a larger area but that's because most of the product I've got is concentrated on the higher area of the cheek but now I'm just using the brush to sweep over it to blend it all naturally so again you don't see a seam between the blush and my Foundation it just very gradually moves into that nice pinky area okay so here's my trick for glassy looking beautiful cheeks all you need to do is grab our soothing barrier bar um you should tell it's one of my favorites get a little bit onto your ring finger and again it doesn't need to be too much and we're going to warm that up and we're going to dab that on the cheeks now you can actually mix this so if you're wanting it to be quite intense you could actually mix the sand balm and the blush together or as I'm doing it look at that really nice healthy glow ah putting a bomb on your cheeks it's just look at that no illuminizer it's just beautiful balm so I'll show you by mixing a little bit onto my finger so I've dipped my finger into the sand balm first and then I've put my finger into my blush pot okay so you then because then the blush the loose blush is going to stick to the SandBar rub your two fingers together like this so make sure you've got enough of the balm on there to create a bit of a cream and then you're going to rub them together as I said and you've just instantly created your own little cheek color see pretty again so it's just sand bomb fingers dip it into your blush the blush will stick to the finger rub it together so it creates a cream and look at that absolutely Divine dewy healthy looking skin we love this glass skin look okay what I also love about this is you can use it on your lips as well so I love when I'm doing a nude look just putting whatever I've got on my cheeks on my lips again so I'm just putting a little bit of the sand balm or the soothing barrier balm onto my fingers and then I'm dipping it into this beautiful winter blush pot mixing it together and then popping it on my lips like a beautiful lip gloss balm and that winter color as a lip balm color is just beautiful it's very much a pinky sort of a coral almost it's just gorgeous okay so there's my tips around getting your skin looking absolutely beautiful glassy my no makeup nude look you can of course add in other things like luminizers or you might want to mat down your T-Zone that's completely up to you but what I'm going to do now is show you how to create the look of Full Art looking lashes just using some eyeliner on the waterline or underneath the Lash line on the top lashes so all I want you to do is pull up your eye like this and you're placing your whether it's black or brown your eyeliner on this wet it's called a tight lash line so we're just putting it under here and just mainly focus on the outer third we're just going to keep tickling tickling okay so see with that how it's given this eye a very subtle lift to this eye okay so it looks lifted it looks like I've got more lashes on this and all I've done is put the eyeliner on that lash line underneath the lashes so again lifting up and go back and forth quite a few times because we really want to get the color into the lashes so go the whole way but focus on the outer okay perfect he might not even need to pull your eye if you feel comfortable enough to just if you call it along there awesome okay great so the next thing that I'm going to show you is just how to very quickly curl your lashes and then after that we're going to pop on a really beautiful eyeshadow color so you can just use something that's quite basic for day to day of course you could use the blush that you've got on your cheeks you could pop that on your eyes as well so what we'll do is we'll Prime our lashes with a lengthening primer first which is going to give really long beautiful looking lashes now with your eyelash curler we want that metal part of the lash curler to sit on the lid press down and look at that it lifts the lashes for you so all you need to do is gently clamp down now there's no trying to grab and wiggle it you just press down onto the eyelid and those lashes will pop up for you see again this top metal bar of the curler place it down onto the lid the Adorn curler is just so well designed for sitting on the eyelid I don't know how many that I've tried over the years and they just are too big like the the semi-circle's not right and it's digging in so it's really important to get one that fits your eye okay so that is my lashes curled very quickly I'm just going to pop on some of our tinted eye primer and I'm just going to use that kind of like a nude eyeshadow but just to help neutralize The Vines in my eyes which is discoloring and having this on is going to look right in my eyes it's lifted them they look more youthful and look it's not drawing attention especially if you've got veins or you've got bloodshot eyes the veins on the top of your eye area is going to draw attention to that so I've neutralized that and now because I want this beautiful nude look I'm going to just dust a little bit of our base nude eyeshadow over the top you can use any kind of neutral light color but I'm really wanting that fresh Bright Eyes fresh bright healthy glowy skin this is just your everyday gorgeous looking skin but better looking skin Okay so now getting to your lash primer the lengthening primer it is my top secret for longer lashes so all you need to do is pop on one coat foreign and there we go now a coat of mascara now a little trick with your mascara I want you to focus on the roots of your lashes okay and I want you to build up the roots of your lashes more than the mid lengths and the tips of your lashes simply because that is going to help the intensity of your eye line it's also going to make you look like you've got more lashes so it almost acts like an eyeliner but it also gives you the look of Fuller lashes so it's focusing the mascara more on the roots rather than the mid and the ends if you focus so much on the ends or the mid length up to the tips it weighs the lashes down and they end up drooping over the day but also you're more likely to get that really cloggy looking or stuck together lashes so this again gives you a natural eye line increases the look or the density of your lashes but it also is a foolproof way of not getting clumpy looking lashes alright so if you need to you can lift your eye up like this and you're just going to focus on as I said you can either wiggle it or I just keep going back and forth a little bit on the inner ones here okay load up the mascara again so you can already see I haven't even put any mascara on the mid or the ends but it's already looking Fuller on this side so again I'm just going to tickle underneath my lash line with the mascara okay and then the other side we want that to dry okay reload the mascara and I'm using the waterproof mascara for this just because for me I feel like I get extra length I don't have to worry about the mascara moving throughout the day okay perfect so now what I'm going to do is a very light coat on the edge of all the mid lengths and the ends okay just a very light coat because we're going to curl the lashes again for just enough so there's something on the lashes but not a lot now curling the lashes again at this point the mascara is going to act like gel okay like hair gel and so this is my other top tip is to always curl your lashes again after you've got one application of mascara on and I'm going to show you why look at what happens again we're pushing down on the eyelid then we're clamping down and just gently remove the lower lashes if they've been caught and then lift up into the socket this really stretches and curls the lashes right at the roots but again the mascara is acting like a gel look at that all right other side just gently open the curlers and pull out any of the bottom lashes curl and lift up into the socket I mean honestly what a difference and so now I'm popping on my second coat and this is where I will just very gently focus on the tips of my lashes now for the outer lashes I turn the brush around like a pencil so I'm just using the tip of the wand to tickle the ends of my lashes and the same for these inner smaller lashes here perfect a little bit more on this inner one here okay and you can put some mascara on your bottom lashes if you don't have many lashes just leave it because it'll draw attention but just pop a little bit on the outer third rather than the whole way just to give a little bit of definition and there we have my glassy look nude look or no makeup makeup look whichever way you want to refer to it it's just a beautiful look that looks like your skin only better it's glossy it looks like you've just stepped out of a beautiful facial and what I love about it is it's minimal products and very multi-purpose products I really have a play pick some colors that you want to use on the cheeks and the lips grab the sand bomb it is amazing for getting the cheeks and the lips looking super hydrated you could even pop it on your eyelids if you love that slightly wet look over the top of your eyeshadow as well so hope you've picked up a few beautiful tips and there we have it