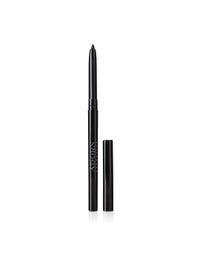
Briony's classic smokey eye suits even a makeup novice. 3 products is all you need from our vegan eye makeup range: Smokey Quartz Crayon, Mineral Eye Shadow (any shade) & Black Mineral Vegan Eye Liner.
TRANSCRIPT
Hey, I'm Briony Kennedy, and today I'm going to show you my evening look. I thought I would take you through some of the steps to get flawless-looking skin, but something a little bit simple on the eyes. I have prepped my skin already, and what I'm going to do to get started is pop on a little bit of our liquid illuminizer using the blender to do that. I'm just putting a little bit on to the cheeks just to give a little bit of dewiness to the skin and have that really nice dewiness come through the foundation.
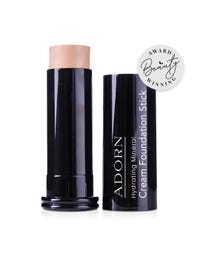
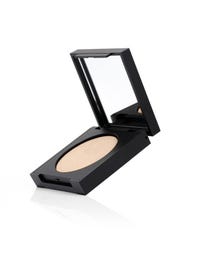
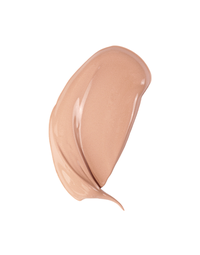
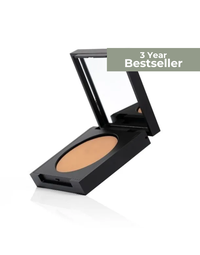
The next thing that I'm going to do is put on the cream foundation. I'm just going to draw that on my face, and then I'm going to blend that. Okay, now I'm happy with that coverage. What I'm going to do now is put on the compact mineral foundation just to give me a little bit of extra coverage where I need it. Just around the T-Zone where I'm a little bit red on the cheeks as well. This will also give me a little bit more of a matte finish in those areas.
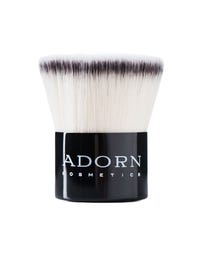
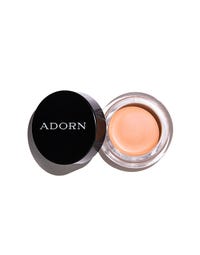
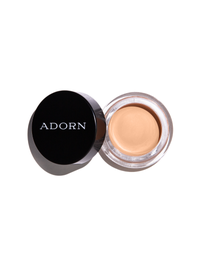
The brush that I'm going to use for this particular application is the Kabuki, and I'm going to press this on where I need more coverage. All right, so now what I'm going to do is just correct my brows. I'm just using little feathery strokes with this particular pencil. Okay, then comb the pencil or the brow powder through the brows. It doesn't matter what products you're using. If you do that, the comb just helps to separate the product into looking more like little hairs. Okay, now that I've finished my eyebrows and my base, I'm going to correct underneath my eyes. I'm quite dark, so I'm going to use our peachy sleep concealer. You could use one of the other concealers in the range if you wanted to as well. Just to help neutralize any of that black or sort of blue appearance. So, putting the peachy sleep, I love to use my fingers for these. Ring fingers, as they're more gentle, and just using a patting motion right in the corner where you get that very dark vein.
And we just want to keep blending that. So, I'm really focusing just on this dark circle. I'm not putting too much of the product here where we smile. And if you're a little bit more of a mature age, you might have some fine lines or deep lines that you don't want to enhance. So, keeping the concealer just to this outer corner here and just where you've got that dark circle here. Okay, so now what I'm going to do is grab the buff and blend brush, and I'm just going to use that around my nose to really push the product into the large pores that I have.
The next tip for me is setting down the concealer underneath my eyes. I love using the miracle blur powder for this. I just put a little bit on my fingers, and what I love is that not only does it lock the concealer down, but it actually blurs the little bumps that I have underneath my eyes, so they're not so obvious, which is what I love. The next thing that I'm going to do is put on a contour product or a product that I'm going to use to warm up my complexion. So, whilst everything looks nice and even and flawless, it also looks quite one-dimensional, and I also look quite pale. So, even if I was a little bit warmer in color, if you've just got one color on the face, it can look less healthy than if you were to add in a second color, being something that will contour or bronze the face or at least a blush.
So, I'm going to use the Contour compact here. Now, I'm going to bring it onto and underneath the cheekbones just a smidge. I'm not going to run it down too low. My face is quite drawn, and I've got quite a narrow face. I don't want to accentuate that. So, I'm going to put my contour product more on a horizontal rather than it going down diagonally. So, putting it just here. The next product that I'm going to use is the tinted eye primer. This particular product is going to help neutralize my eyelids so that it's going to take away any of that blue or red veins that are prominent, and it's also then going to give me a nice easy even base to work with when I put my eyeshadow on.
Now, you can use a brush. I really like using my fingers, but of course you could grab one of the Adorn brushes to do this. Okay, so the next thing that I'm going to do is just smoke my eyes a little bit with our smoky quartz crayon. Now, you could use a black, you could use a brown, you could use any of the colors really that's darker, maybe even the topaz crayon just to give a bit of depth to the eye. I'm just putting it in a little bit of a C shape. Make sure you don't go down below your eye if you can avoid it.
Your eye line. Grab one of our brushes, probably a dome blending brush will be best, and we just want to feather the ends of this just a little bit so that it's not so obvious. Okay, perfect. So, you can see just using the crayon on its own is perfect for giving the eyes a little bit of a lift and awesome for evening as well. But I'm going to put on the obsidian eyeshadow over the top of this smoky quartz. It's got a little bit of gold on, and there's a little bit of a gold fleck throughout the obsidian eyeshadow. So, putting a little bit on the same brush that I was just using. Now, if you're someone who struggles with a bit of fallout, you could always do your eye makeup first and then do your foundation, then do your concealer. So, that you can just wipe away any mess. You could always just use fingers or tissue underneath your eye as well. Or otherwise, just make sure you tap off any excess and you shouldn't get any fallout. I'm placing it directly over the top of a nice cream color but going a little bit onto the nude area, and you can see now it's giving that really nice graduation of color.
Okay, so if you have gone down too low, and you can see very slightly that's below my eye line, I'm going to correct that with just a tiny weeny little bit of concealer, or you could definitely use the tinted eye primer as well. So, just get a little bit on one of your concealer brushes, a tiny amount. And what you're going to do is you're going to use that to correct, and look at that, see how it just gently flicks the product up. It almost gives me like an eyeliner look. Okay, and then just with your finger, just blend away that, and look how lifted this looks to this side. Okay, so again, just put a little bit here. Pat it down with your finger because, again, you don't want an obvious line.
Now, what I'm going to do is use a little bit of black eyeliner, and I'm just focusing on this outer third of my eye. Now this part of my eye, I'm going to the inner rim, and then I get a perfect line that way. Trying to do it on the top of the skin is really difficult to get a straight line. So, the inner rim here and then under the lash line and the inner rim there gives really good definition for the lashes. See, perfect line, and it's just because here in a rim and on the top of the eye here and then you just get them to meet. Okay, so now what I'm going to do is put a little bit of a flick here, but I'm going to use a brush to do that.
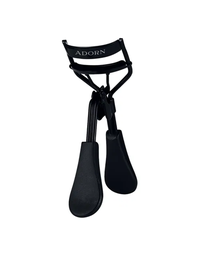
So, if you grab one of our angle brushes and you just use it to tickle onto your pencil, make sure that it's nice and flat and pointy. And then using the long end first, we're going to create a little wing. So, if you have droopy eyelids or hooded eyes, a little bit of support, but don't stretch the eye too much. Apply it to the skin as it looks when it's relaxed. When you're curling your lashes, all you need to do is grab the Adorn lash curlers and place this metal part on your eyelid. It should really nicely and snugly fit, and you'll see just by gently pushing down, it's just pushed the eyelashes up. So, you don't need to try and grab them.
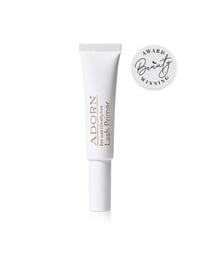
Just, as I said, pop it on the eyelid. Look, push it down, and it pushes the lashes up for you. And then all you need to do is clamp down gently and then lift up foreign. Okay, so putting on the lash primer. This product is absolutely lengthening. Makes a massive difference. So, just put one coat on. Now I am going to go to the mascara. Now, you can use any mascara that you want, but I love the waterproof mascara in the Adorn range. I'm going to use a black color. There is brown, and if you've got sparse lashes or they're a little bit on the shorter side, go with the brown because it's less obvious that you've got fewer lashes.
If you go with a brown, the black can make that stand out a little bit more. So, in this instance, I will be using the black, and I'm popping on a coat on the outer lashes first. Okay, now, before that sets too much, being a waterproof, I'm going back to the curlers, and I'm now doing the same technique, pushing down, grabbing those lashes, making sure I pull out any of the lower that might have got trapped. The waterproof one coat will act like a little gel, so it's going to help these lashes look even longer. Look at that. Okay, so it's curling on a naked lash and then curling on one coat of mascara, and it just makes a massive difference.
All right, so we'll go to our second coat of mascara now. All right, so now it's time to move on to lips. So remove the balm that you've got on because otherwise then your lipstick is not going to stay on as long as you would like it to. So you want to have the lips nice and dry. Now this is one of my favorite combinations. I'm going to use our red lip liner and our persistence, which is a really nice pink. So that's my little ombre that I love to do. When I'm doing lip line, I do not place it and then draw a line. I feather it along the line of my lip like this, and you'll actually get a, and very softly, you'll actually get a straighter line that way.
If you press down and you drag it, you're not going to get a straight line because you're distorting the way your mouth naturally sits. Just a gentle feather. Once I'm happy with the lip shape, I'm now going to use this lip liner just to blend into the lip a little bit, and this is what gives me this ombre appearance. So I've got one color on the outer, blended in, and then I put the pout area as a different color, usually something that's a bit lighter, so it doesn't have to be perfect. But just realistically, what you want to do is leave this big chunk of lip here or the pout area nude, and then you just pick your favorite lipstick, and I'm going to use the persistence which is a nice bright pink.
And I'm just massaging those two colors together, and look at that beautiful. Love an ombre lip. Now, if you're really concerned about your lipstick staying put, you'll find with the brights range in the Adorn Cosmetics line, these particular lipsticks stay on quite a long time. In fact, you'll need a bit of an oil to remove them at nighttime. If you're using a different color from one of the other collections, still very long-wearing, but what you might want to do is just blot down onto a tissue focusing more on this inner part of the mouth and do that a couple of times and just keep blushing it until it's staining the lips. What you're doing every time you do that is pushing that product and that color further into the lip area.
So, now I'm completely finished. Just to rehash what we did before I go off and get my hair ready is the base, being a cream, and then I topped that off with the compacts over the top. So, the color that I used today was light medium in both, so the cream was placed on over the top of one of our moisturizing prep products. And then I've used the light to medium cream, light to medium compact. Then I've warmed my skin with the Contour compact. I've used that around the forehead, around on the cheeks, the cream spring blush Divine, popped that over my cheeks and my temples with a little bit of the winter blush on the apples of my cheeks.
Peachy Sleep, can't go without that underneath my eyes to help get rid of and neutralize those dark circles. And then for the eyes, what we've used is the smoky quartz to give that really nice base and depth to the eyeshadow, which was the obsidian that we've used today. Now I've also put on the illuminizer on the inner part of the eyes underneath the brow bone to give a lift and to make my eyes look a little bit wider set and to make them look a little bit healthier as well. So I used a clean brush to do the blending, remember. So always have one handy. The Brows I have used the wind-up brown pencil. So just have a bit of a play around what's going to work for your brows. I've gone a bit stronger because I'm going out tonight. The lashes, of course, with a primer length and primer have to have that product, and the black waterproof mascara. And to finish off lips was the red mineral liner and the persistence lipstick.
So there you go. There's my going-out evening glamor look. I hope there's a few little tips that you can take away from that. If you're feeling like you want to be a little bit more dewy, top it off with your rose mist, and that will give a really nice chewiness to the face.

